Introduction
Have you ever dreamed of recreating a cake that’s both delicious and iconic? The Miss Trunchbull cake, inspired by Roald Dahl’s Matilda, has captured the imaginations of dessert lovers everywhere. This towering, rich chocolate cake, famously known for its sheer decadence, is a showstopper that will impress at any event.
In this guide, you’ll learn how to make a stunning Miss Trunchbull cake from scratch, explore its literary origins, and discover expert tips for achieving the perfect bake. Whether you’re a novice or an experienced baker, this comprehensive article will help you create a masterpiece.
Table of Contents
What is the Miss Trunchbull Cake?
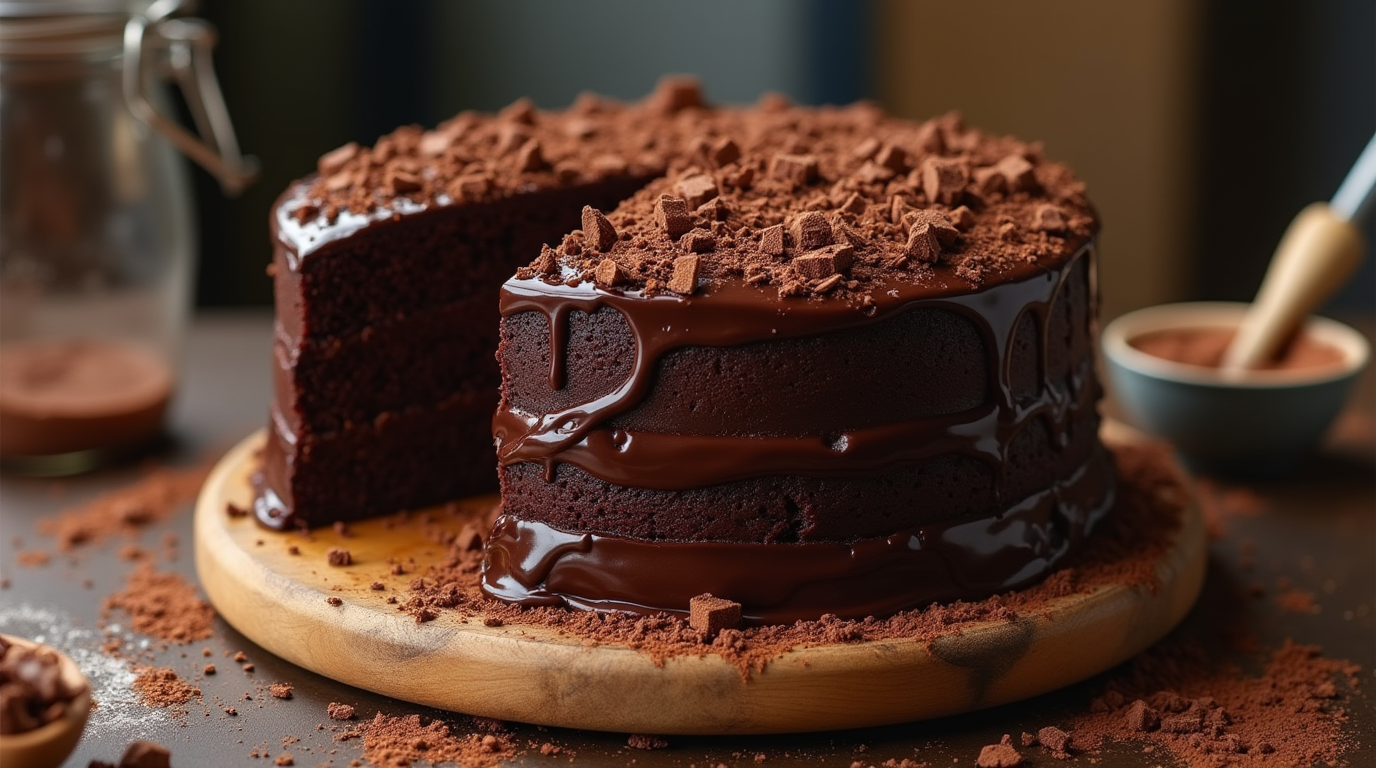
The Miss Trunchbull cake is a fictional yet memorable chocolate cake featured in Matilda. The cake is described as rich, dark, and impossibly moist, making it the ultimate indulgence for chocolate lovers.
Key Characteristics:
- Decadent chocolate layers
- Thick, fudgy ganache frosting
- Ultra-moist texture
- Perfect for special occasions
Ingredients and Tools Needed
Ingredients:
- Cake:
- 2 cups all-purpose flour
- 2 cups granulated sugar
- 1 cup unsweetened cocoa powder
- 1 tsp baking powder
- 2 tsp baking soda
- 1 tsp salt
- 1 cup buttermilk
- 1 cup hot coffee
- 1 cup vegetable oil
- 2 large eggs
- 2 tsp vanilla extract
- Ganache Frosting:
- 2 cups heavy cream
- 16 oz dark chocolate, chopped
- 2 tbsp butter
Tools:
- Stand mixer or hand mixer
- Mixing bowls
- 9-inch round cake pans (x3)
- Cooling rack
- Offset spatula
- Cake turntable
How to Make Miss Trunchbull Cake
Step 1: Prepare the Cake Batter

- Preheat your oven to 350°F (175°C). Grease and line the cake pans.
- In a large bowl, sift together the flour, sugar, cocoa powder, baking soda, baking powder, and salt.
- In a separate bowl, whisk buttermilk, hot coffee, oil, eggs, and vanilla extract.
- Gradually mix the wet ingredients into the dry until smooth.
Step 2: Bake the Cake Layers

- Divide the batter evenly among the prepared pans.
- Bake for 30-35 minutes or until a toothpick inserted in the center comes out clean.
- Allow the cakes to cool completely on a wire rack before frosting.
Step 3: Make the Ganache Frosting

- Heat the heavy cream in a saucepan until it begins to simmer.
- Pour the hot cream over the chopped chocolate and butter.
- Stir until smooth and glossy.
Step 4: Assemble the Cake

- Level the cooled cake layers if necessary.
- Place the first layer on a cake board and spread ganache evenly.
- Repeat with remaining layers, coating the top and sides generously.
- Smooth the frosting with an offset spatula for a clean finish.
Decorating Ideas for Miss Trunchbull Cake
- Classic: Dust with cocoa powder or chocolate shavings.
- Elegant: Add edible gold leaf or metallic sprinkles.
- Themed: Top with a Matilda book cover edible print.
Troubleshooting Common Issues
| Issue | Cause | Solution |
|---|---|---|
| Cake too dry | Overbaking or too much flour | Reduce baking time, measure carefully |
| Ganache too runny | Incorrect chocolate ratio | Add more chocolate, chill longer |
| Uneven layers | Uneven batter distribution | Weigh batter for each pan |
Expert Tips for Success
- Use room temperature ingredients for better mixing.
- Chill the cake before slicing for cleaner cuts.
- Double sift the cocoa powder for a lighter texture.
FAQ About Miss Trunchbull Cake
What makes Miss Trunchbull cake so special?
The combination of ultra-rich chocolate cake and smooth ganache frosting creates an unforgettable dessert.
Can I make this cake in advance?
Yes! Store the cake in the refrigerator for up to 3 days. Bring it to room temperature before serving.
How can I make it gluten-free?
Substitute the all-purpose flour with a 1:1 gluten-free flour blend.
Conclusion
Creating a Miss Trunchbull cake is a rewarding experience, blending literary inspiration with culinary delight. Whether for a birthday party, book club, or just because, this indulgent dessert is sure to impress.
Ready to bake your own masterpiece? Gather your ingredients, follow the steps, and share your creation with friends and family. Don’t forget to tag us on social media with your version of the iconic Miss Trunchbull cake!
Miss Trunchbull Cake: Advanced Techniques & Variations
Now that you’ve mastered the basics, let’s dive into some advanced techniques and creative variations to elevate your Miss Trunchbull cake even further.
Advanced Baking Techniques
1. Enhancing the Moisture
To achieve an even more decadent and moist cake, consider these expert tricks:
- Sour Cream Addition: Replace half of the buttermilk with sour cream for a richer texture.
- Olive Oil Substitute: Swap out vegetable oil for high-quality olive oil for a subtle depth of flavor.
- Simple Syrup Soak: Brush each cake layer with a cocoa-infused simple syrup before frosting.
2. Achieving a Flawless Ganache Finish
For a sleek, professional look:
- Double Boiler Method: Melt chocolate gently over simmering water to prevent burning.
- Cooling Time: Let ganache cool slightly before spreading to achieve a velvety consistency.
- Crumb Coat: Apply a thin layer of ganache, chill for 15 minutes, then add the final coat for a smooth surface.
Creative Variations
1. Trunchbull’s Triple Chocolate Explosion
For an extra chocolatey experience:
- Add chocolate chips or chunks to the cake batter.
- Incorporate a layer of chocolate mousse between the cake layers.
- Drizzle with dark chocolate sauce before serving.
2. Salted Caramel Trunchbull Cake
Enhance the flavors with a sweet-salty contrast:
- Layer salted caramel sauce between each cake tier.
- Sprinkle flaky sea salt over the ganache for a gourmet touch.
- Garnish with caramel shards or toffee bits.
3. Raspberry Dark Chocolate Delight
For a fruity twist:
- Spread a thin layer of raspberry jam between cake layers.
- Add fresh raspberries on top of the ganache for a burst of tartness.
- Infuse the ganache with a hint of raspberry liqueur.
4. Espresso-Infused Trunchbull Cake
For coffee lovers:
- Replace hot coffee in the batter with freshly brewed espresso.
- Add a layer of espresso-flavored buttercream between the layers.
- Garnish with chocolate-covered coffee beans.
Perfect Pairings
To complement the intense chocolate flavors, try these pairings:
- Beverages: Espresso, red wine, or chai tea.
- Side Treats: Whipped cream, vanilla ice cream, or fresh berries.
- Decor: Gold-dusted cocoa powder or dark chocolate curls.
Storage & Serving Tips
- Storage: Keep in an airtight container at room temperature for up to 2 days or refrigerate for up to 5 days.
- Serving: Bring refrigerated cake to room temperature for optimal texture and flavor.
- Freezing: Freeze unfrosted cake layers for up to 3 months; thaw and frost when ready to serve.
Final Thoughts
The Miss Trunchbull cake is more than just a dessert—it’s an experience. By incorporating these advanced techniques and creative variations, you can customize your masterpiece to suit any occasion.
Experiment, enjoy, and most importantly, indulge in the ultimate chocolate cake experience!
Happy Baking!
What do you think of this recipe?
There are no reviews yet. Be the first one to write one.